Sunday, November 1, 2009
My Stampin' Up! Story
So how did I join SU! anyways? I actually have my daughter to thank for me becoming a SU! demo. Last year, we were at one of her storytimes at the local library and another mom with her little boy asked me if I would be interested in attending one of her stamp camps. I have heard so many good reviews and raves about SU! and this stamp camp was a great opportunity to see if I agreed with all the SU! excitement. Let me tell you, after attending a few stamp camps, I could easily see why so many people get thrilled about the Stampin' Up! products and projects. The quality of their products is superb. All of their coordinating inks, papers, ribbons, etc... make all of your projects come together beautifully. It was an easy choice for me to join and I hope you'll enjoy it as much as I do! I joined the Stampin' Up family earlier this year during their Sale-A-Bration promotion.
If you would like to learn about becoming a demo yourself, please feel free to call or email me to schedule a time to meet and share. The wonderful thing about Stampin' Up! is that you can be a demo at the hobby or business level. It's your choice! If you prefer to get a jumpstart on becoming a SU! demo, you may simply visit my website at http://www.kerbyskreations.stampinup.net/ Click the “Join Now” button in the upper right corner, and enter the password addicted2stamping (one word/case sensitive).
Happy Stamping,
Angie
Tuesday, September 29, 2009
Autumn and Christmas Gift Ideas
STAMPING ON TILES
The below project involves stamping on tumbled tiles that can be easily found at your local hardware store. The stamp set used is "Serene Snowflakes" and I used Stampin' Up Pastels to add color.


Here is another set of tile coasters I made, but this time I used the hostess set called "Country Morning."

And for the pumpkin poop, I used the new "Twick or Tweet" stamp set and accented the Top Note die with SU! pumpkin pie ink.
These are just Orbit's chewing gum dressed up in cute holiday decor! Again, I used the new "Delightful Decorations" and DSP "Merry Moments" made by SU!
Saturday, August 8, 2009
Our baby boy has arrived!
 It has been too long since I last posted, but I have a very good excuse for my absence lately. Our baby boy was born on July 21st, 2009 and we are so happy for him to be the newest member in our family. His big sister, Valerie, is also thrilled with our new addition and has been such a big helper in taking care of him. His name is Conor David. He weighed an outstanding 9 pounds and 13.4 ounces and measured 21.75 inches in length. Conor was born with a head full of dark hair and loves his mohawk style!
Saturday, May 30, 2009
Post-It Note Holders made with the Bind-It-All

 And here is the inside....
 Here are some with the tiki hut theme...
 And here's the inside...
 And finally here are some beachy ones...
 And the inside...
Thank you for looking! The monograms on the USA and tiki hut ones were hand stamped with Stampin' Up's Lovely Letters Alphabet set.
Monday, May 4, 2009
NSD Challenges hosted by the Pink Stamper

 Challenge #10: Make something using a circular shape.
Friday, May 1, 2009
It's National Scrapbooking Month!
I wanted to let all my friends know that Stampin' Up's Scrapbooking Campaign kicks off today in conjunction with National Scrapbooking Month. If you haven’t already, check out the great promotions we have in store for you throughout the entire month of May, including
- Buy a sneak peek stamp set from the 2009-2010 Idea Book & Catalog--Jumble Alphabet (set of 52; double-mounted)--at a 20 percent discount.
- A limited-time Scrapbooking Starter Kit for just $75
- Buy three packs of Designer Series paper (including our Specialty Designer Series paper) or 12" x 12" textured card stock, and get one FREE!
If you have not had an opportunity to try out the Designer Series Paper (DSP) from Stampin' Up! or if you need to stock up on your supply, now is the perfect time to try it or stock up. For those of you who are new to DSP, I promise you will not be disappointed. Please feel free to contact me if you have any questions or concerns.
A few Stampin' Up cards

Here's a close up of the truck...sorry the picture is a little blurry!
 This is a card to welcome the newest addition (a baby girl just born on April 25th) in Dave & Julie's family:
 Here is a very simple Thank You card using the new scalloped oval punch in the mini occasions catalog:
 Here is just another version of the card:
 And last, but not least, here is another Thank You card using the word window punch:
Cute Little Nugget Purses

 I CASEd (copy and steal everything) this project from a fellow SU! demo (thanks, Tee!). These were so cute and I just had to make them, too. Inside each of these little "nugget" purses is a Hershey's chocolate nugget. The stamp set used is Eastern Blooms (though so many SU! sets would work great on this project) on Whisper White cs and I added a little twist to mine by giving it a scalloped purse flap. Enjoy!
UPDATE - I received a few questions on how to make these. These are easy and fun to do and I just made my measurements based around the Hershey nugget candy. Other candies would be cute in this project, too, but here are the measurements using the good ole' Hershey nugget:
For each purse, you will need a 1.5" (wide) by 5" (long) section of paper or cardstock. I recommend you use cardstock since it's heavier and will hold up better in the long run. You will be able to get 10 sections out of one 8.5" x 11" sheet. Feel free to stamp images on it or leave it as it, especially if it's patterned paper or cs. Also, feel free to use a border edge punch for a decorative purse flap. Score at 1.5", 1", and again at 1.5". Fold at the scored lines. Pierce holes to pull ribbon through on the top for your purse handle. I found it easiest if I tied a knot at one end of the ribbon and pulled it up through the first hole, down the second hole, and then tie the remaining knot. I used my Crop-A-Dial to punch a hole for brad to be used as the purse's closure. Before closing the purse, I used adhesive to secure the nugget in the purse. Ta-da, there's your nugget purse. :)
Stampin' Up! Decor Elements
 Here's a close up of the wording on the decor element:
 And here's a close up of the flying birds:
Thursday, March 19, 2009
Everything and more you ever wanted to know about Stampin' Up! Starter Kit
This will probably be a long post just to warn you in advance. There has been a lot of excitement about Stampin' Up! and signing up with them during their Sale-A-Bration event. I just joined on March 3rd and waited so ever patiently for my kits (I also ordered the Stampin' Memories Add-On Kit - see below post for details) to arrive this week. It felt like Christmas morning when the packages arrived!
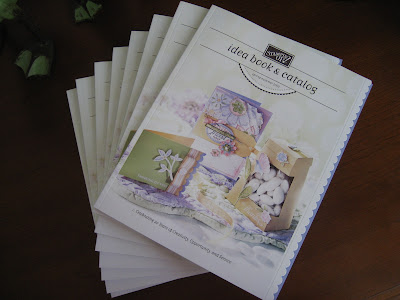
The starter kit normally costs $199 (valued at more than $335), but during SAB, it's discounted for 15% off. And if you join during SAB, you may select any set (value up to $47.95) from the Spring-Summer 2009 Idea Book & Catalog for free! This is definitely a great time to sign up and SU! also does free shipping on their starter kits and add-on kits.
So what are you getting for that hard-earned $169 (after 15% discount)? Here's the list and if you see an "*" next to the item it means that item is recommended but you can choose a set, color, or assortment of the same price of less. I noted my change outs in purple and you can see I swapped out most of my stamp sets...okay, back to all the goodies...
Here is what's all included in the Starter Kit:
- Eastern Blooms Stamp Set*
- Fun & Fast Notes Stamp Set* changed to Flight of the Butterfly stamp set
- Big Bold Birthday Stamp Set* changed to Simply Said stamp set
- Fundamental Phrases Stamp Set* changed to Frames with a Flourish stamp set
- Fast Flowers Wheel* changed to Wheel Tailgating
- Stampin' Around Self inking Handle
- Pixie Pink Ink Cartridge* changed to Chocolate Chip Ink Cartridge
- Stampin' Pastels
- Bold Brights Assorted 8.5" x 11" Card Stock (2)* changed one set to the Soft Subtles
- Kraft Parisian Damask* Decor Elements (large) changed to "Direction of your dreams" in chocolate medium
- Decor Elements applicator tool
- Stampin' Scrub
- Stampin' Mist
- VersaMark Pad
- Blender Pens
- Whisper White Card Stock*
- SNAIL Adhesive
- Basic Black Classic Stampin' Pad
- Real Red Classic Stampin' Pad
- Brillant Blue Classic Stampin' Pad
- Green Galore Classic Stampin' Pad
- Pixie Pink Classic Stampin' Pad
- Business Forms and Tools
And here are lots and lots of pictures. The first picture shows it all except for the business forms and decor element and applicator tool.
 Here's the Eastern Blooms Stamp Set...
 Here's the Flight of the Butterfly Stamp Set...
 Here's the Simply Said Stamp Set...
 Here's the Frames with a Flourish Stamp Set...
 And let's not forget about that *free* set. SU! automatically selects Define Your Life Stamp set which is sure to be an all-time favorite, but you can pick any set valued at $47.95 or less. There are "life" definitions for every letter of the alphabet...this will be perfect to use in scrapbook layouts!
 And here are the pretty assortment of ink colors and the VersaMark pads...
 And here's the Stampin' Scrub and Stampin' Pastels...
 And here are the Bold Brights Assorted Card Stock in 8.5" x 11"...total of 12 vibrant colors!
 And here are the Soft Subtles Card Stock in 8.5" x 11"(there's also 12 colors, but I already used 2 color sets for a card swap already!)...






.jpg)


