
In honor of the Michigan and Ohio game, Valerie and I made John some state shaped cut out cookies. A big thank you to Dave and Julie for sending us these special cookie cutters! I think we'll make these every year for the big game! John took a platter of these to his work to share in their Thanksgiving potluck luncheon, and he seems to be surrounded by Buckeye fans! My "O's" are a little shakey, but I think I might have been a little tired after sitting through a 4 hour Infant and Child CPR class earlier that evening.
Here are the Michigan Cookies!


And here are the Ohio cookies!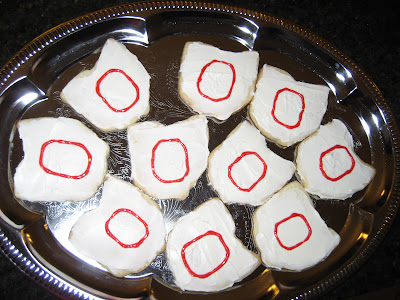

And here are the taste testers!


 Each Halloween treat pail had their own personalized name tag which can be used as a bookmarker. I used Martha Stewart "drippy goo" alphabet clear stamps for the names along with her drippy goo edge punch.
 Here's a picture of all the name tags I made...the first letter of each name was accented with black diamond stickles.
 Here's a view of the backside of the name tags. The ghosts on the tags and pails are Sizzix die cuts (medium yellow die) accented with cat's eye's purple ink.
 14 pails in all! I found the pails in the dollar section at Target. They were actually 2 pails for a buck.
 Here's the whole enchilada!
 Valerie delivering her Halloween treats to the YMCA Kid Zone staff. She loves hanging out with the girls!
 This is a simple greeting card using the It's a Stretch stamp set on the front.
 This is a gift card holder we made with the Big Flowers stamp set.
  And here it the inside of it. Green and red colors...just in time for the holidays!
 This is a Christmas card we made using the embossing technique. My SIL, Julie, introduced me to embossing years ago and it gives your cards a wonderful dimension and shine! The stamps used on the front and inside of this card are from the Snow Swirled stamp set.
  Here a sneak peak to the inside of the card! ;P
 Here's the inside of the card. Thank you for looking! I hope these pictures do not show up too small and you can see the detail in them.
 Ooh-la-la...look at all the pretty pages inside!
 I made 3 other ones along with the "threading water" punch style one (2nd from the left above). Afterwards, I monogrammed each one with the letter "V" and included pictures of my daughter, Valerie on the 6 layered pages inside and passed them out to my family.


.jpg)


